Table of Contents
Introduction
What is Glyph Drawing Club?
What is modular design, text art and ASCII art?
Basics
Getting started with the basics
Change the size of the canvas
Moving around the canvas
Undo / Redo
Preview image
Saving your work
Saving and exporting your work
Advanced
Area selection tools
Working with layers
Using glyph sets
Paint mode
Glyph offsets and scaling
Incorporating color
Working with other fonts
Problems?
Troubleshooting
What is Glyph Drawing Club?
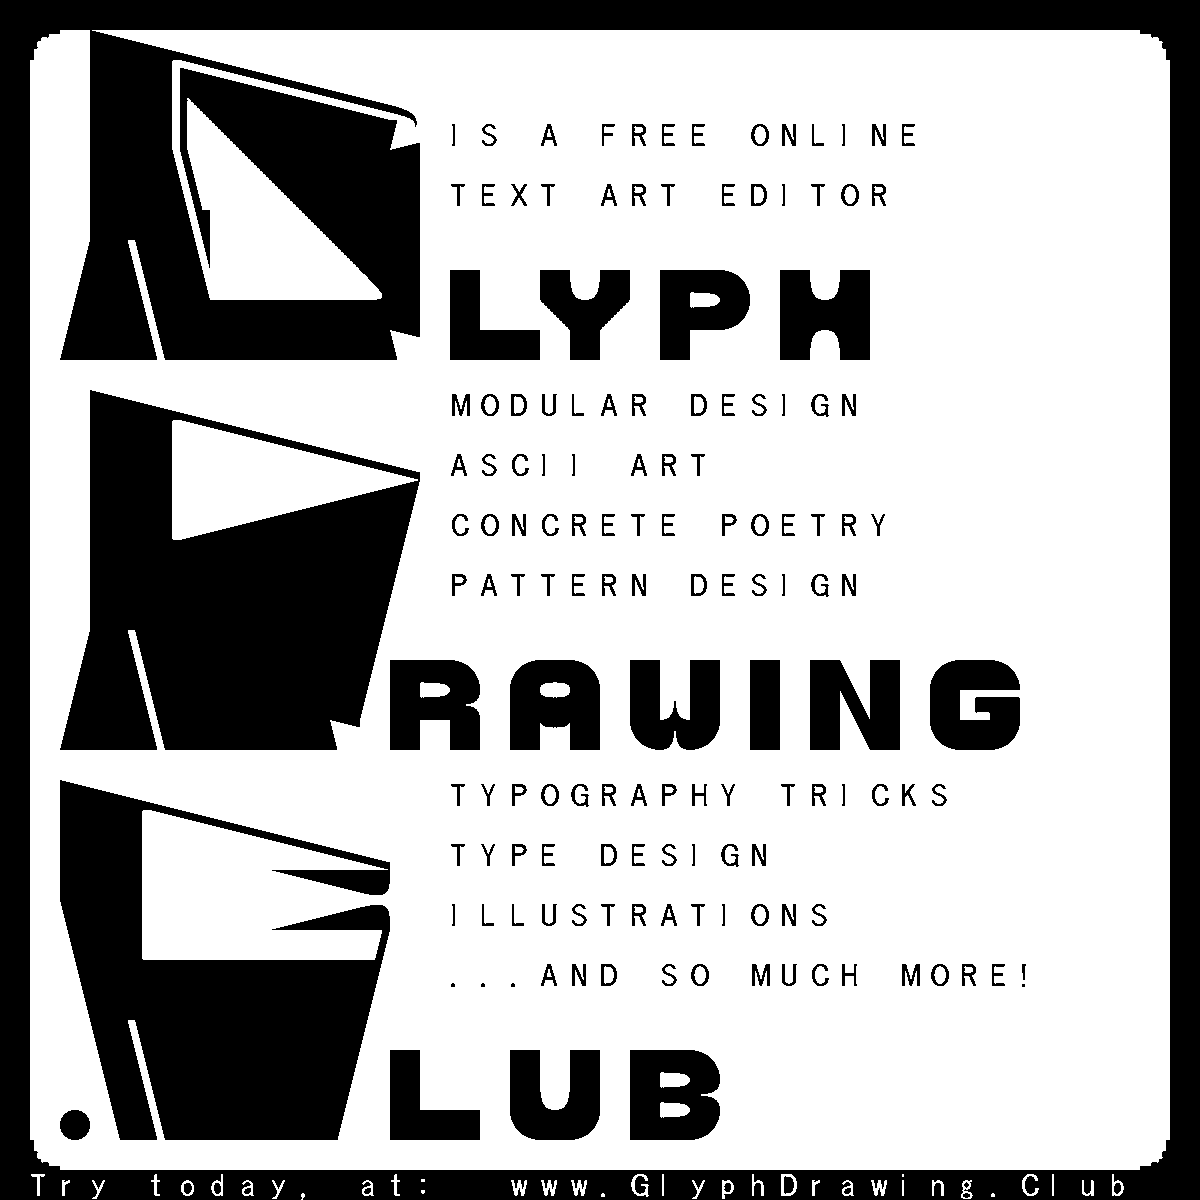
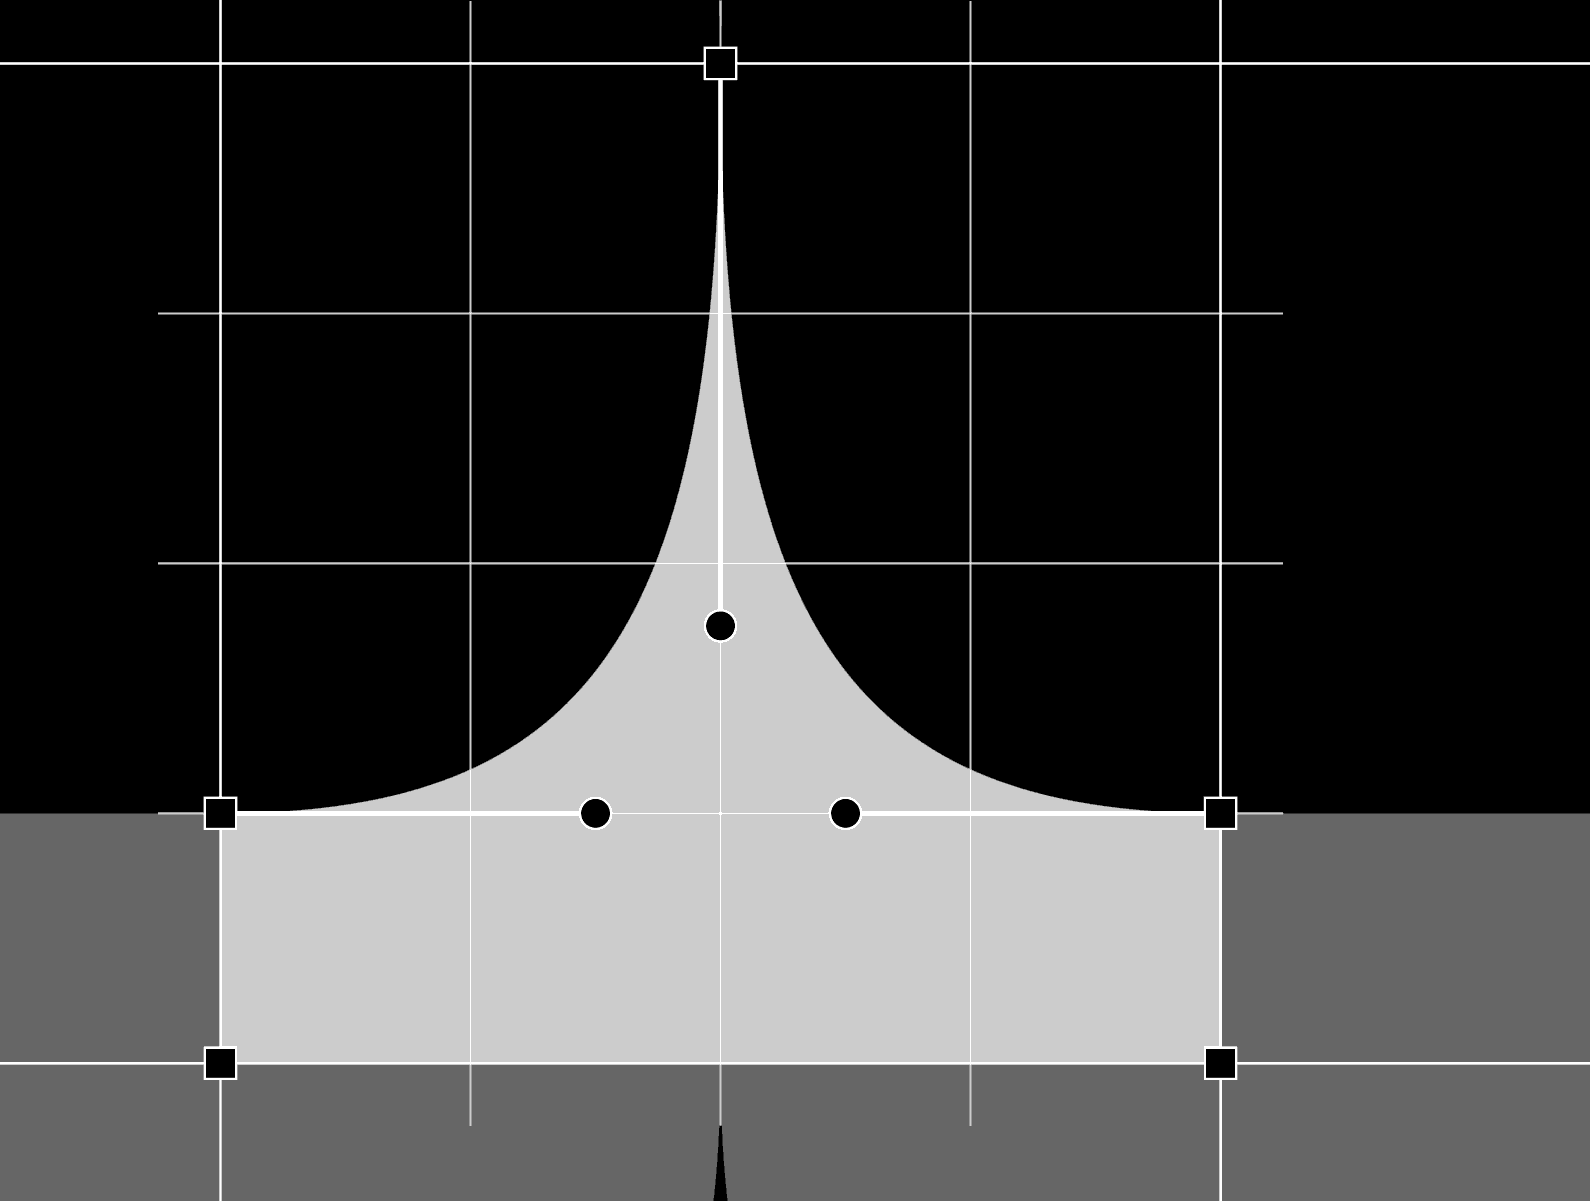
Glyph Drawing Club is a free online modular design and text art tool, suitable for creating custom type design, illustrations, patterns and more.
The editor is based on an adjustable grid into which users can “draw” with a set of geometric patterns or with any typographic symbol from any font.
Creating images with Glyph Drawing Club requires a lot of precision and relies heavily on keyboard interaction and shortcuts instead of just the mouse. Learning how to use Glyph Drawing Club is simple and you can jump right in without a lengthy tutorial, but if you want to achieve faster workflow and higher precision it's important to familiarise yourself with the program, its various features and shortcuts. This tutorial tries to cover everything there is to know about how to use Glyph Drawing Club.
What is modular design, text art and ASCII art?
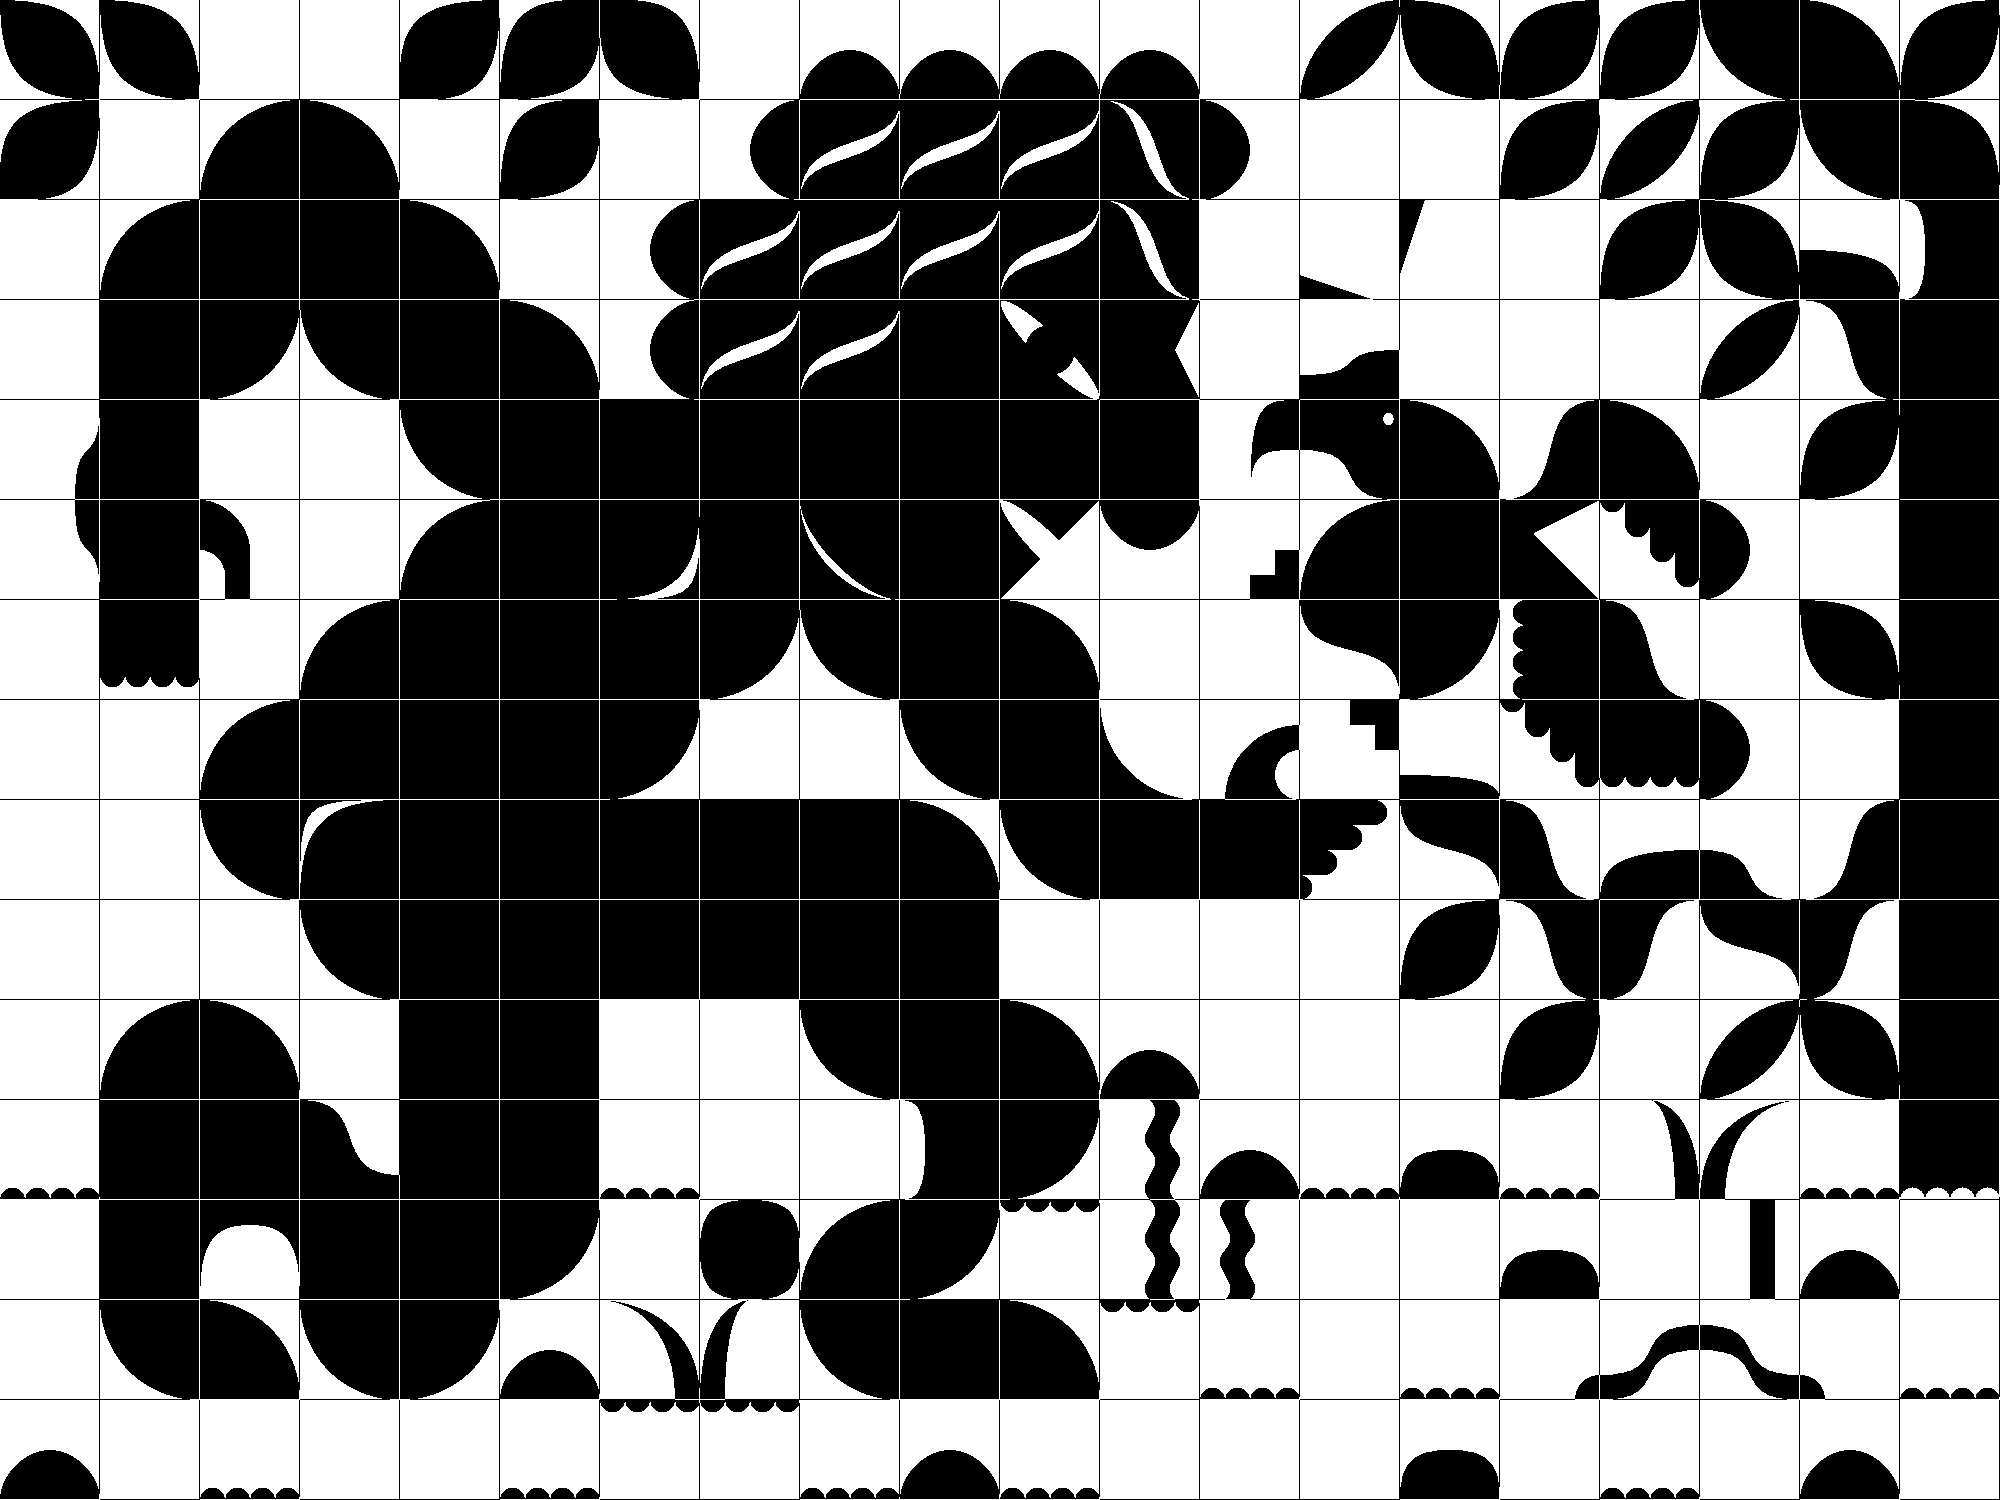
There's no satisfying answer to properly encapsulate modular design, text art or ASCII art as one thing. Text art has a history spanning several thousand years from visual poetry to typewriter art to even knitted crafts that all have widely different aesthetics and process of making. What's common with all of these art forms is that they are all somewhat modular, combining several smaller elements within a larger system or structure. They are also constrained somehow by the limits of the tools used. For example, ASCII art was born out of the constraint textmode had in early computers. Textmode is a computer display mode in which content on a computer screen is represented in characters rather than individual pixels. In order to create images you'd form a sort of mosaic with a set of typographic symbols on to a rectangular grid of character cells, each of which can contain one typographic symbol.
Working with constraints is what drives the creative process when doing any type of text art. While working with limits frees up part of the thought process by taking some decisions off the table, it's also mentally challenging and stimulating: how do I make these constraints work for me and allow me to achieve what I want? How can I push the limits of this process or tool? Making an image this way feels like a puzzle to solve where the pieces don't quite fit together so you have to get creative... and the outcome is often quite delightful with all its quirkiness.
One could say Glyph Drawing Club is just a vector drawing program (which it is), but it's this method and process of creating that makes it unique and exciting. Glyph Drawing Club is inspired by old skool ASCII art editors such as PabloDraw and utilises aspects of them such as keyboard heavy workflow, a limited selection of symbols and a uniform grid while bringing an improved workflow, customisation and openness to the creative process making it more fun and versatile.
Getting started with the basics
Let's get started! Open glyphdrawing.club. On the left side of the page is your canvas, and on the right sidebar are all your tools.
Clickon any glyph under Glyph selection. Press "Next" and "Previous" buttons to browse more shapes.- Press
qto draw. - Move around the canvas with
arrow keys. - Press
fto flip,rto rotate orito invert. - Erase with
space barore
And that's it! By placing shapes next to each other you can start creating your mosaic: be it custom type, illustration, pattern etc. With these basics you can create anything and everything, but to speed up your workflow I recommend familiarising yourself with the rest of features and keyboard shortcuts.
Important note about Tesserae
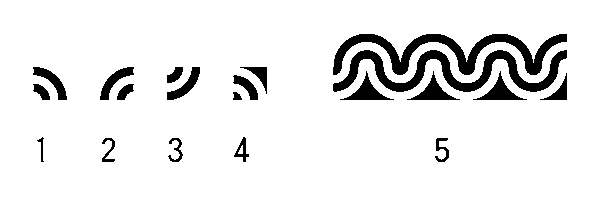
The default font Tesserae 4x4 is specifically designed to be used with the Glyph Drawing Club. It's based on a 4 by 4 grid, meaning that all the shapes in the font can connect to each other from one or more of the 4 segment points on each side, either perpendicularly or diagonally. This allows you to place glyphs next to each other creating one seamless shape. I recommend exploring different shapes, rotating, inverting and flipping them and see how they connect to other shapes.
Change the size of the canvas
You can adjust the size of the canvas from the "Settings" tab by clicking the buttons next to the "Canvas height and width". You can also add or delete rows or columns at your cursor by clicking the Add/Delete Row/Column buttons.
If you want to start over and reset the canvas completely, press the "Empty Canvas" button.
Moving around the canvas
There are two main ways to move around the canvas:
-
Press
Arrow keysorWASDto move the red cursor- You can also press
Alt+Arrow keysto move 5 cells at a time
- You can also press
-
Left clickon the canvas
Undo / Redo
The amount of undos is limited, so don't rely on it too much!
- Press
Cmd or Ctrl + zto undo last action on the canvas - Press
Cmd or Ctrl + Shift + zto undo last action on the canvas
Preview image
- Press and hold
pto preview your image - Or press
hto hide and show the grid
Saving and exporting your work
Your canvas is automatically saved into your browsers local storage, which means that you can safely close the glyphdrawing.club site, and find your canvas intact when you reopen the site the next time (on the same computer, browser and if you haven't cleared your browsing data). This also means that you should only work in one instance (tab) of glyphdrawing.club, because the storage is shared between instances.
Save and load files
- You can save your canvas by writing your filename in the input field and clicking "Save". This will prompt you to download a filename.gdc file, which is your working file similar to something like .psd or .ai file.
- You can load any filename.gdc file by clicking the "Choose file" button next to "Load from file".
Export as PNG and SVG
- You can export your canvas either as PNG or SVG by clicking the "Export" buttons.
- You can specify the resolution of the PNG file with the "Size" input field. The default value is 5, which is 5 times the actual size of your canvas.
License
You are free to use anything you make with GlyphDrawingClub anywhere (private or commercial), without credits or licensing info.
Area selection tools
Getting familiar with area selection tools and how to use them is the fastest way to speed up your workflow. I highly recommend using these and memorising the shortcuts.
Select an area
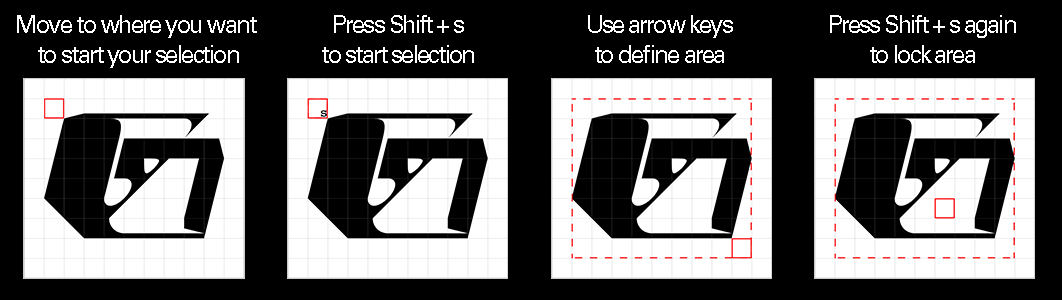
- Move the red cursor to the point where you want to start the selection
- Press
Shift + sto start a selection area. - Use the arrow keys and move the red cursor to the point where you want to end the selection.
- Press
Shift + sagain to lock in the selection. - Alternatively, you can select an area with your mouse by holding
Shiftand holdingleft clickdown and dragging out an area. - You can also select the whole canvas by pressing
Shift + a
Deselect
- To deselect an area press
Shift + d
Copy & paste
- After you've made a selection (as indicated by the red marching ants), move your cursor to a new spot on the canvas and press
Shift + cto paste in the selected area. The paste starts from the top-left corner of your selected area. - Note: Pasting a selection will erase anything in its path. If you want to paste something on top of another area that has glyphs in it, make sure they are on different layers.
- If you want to use a glyph already on the canvas but can't find it from the glyph list, you can move over the glyph and press
c.
Transform glyphs in the selected area
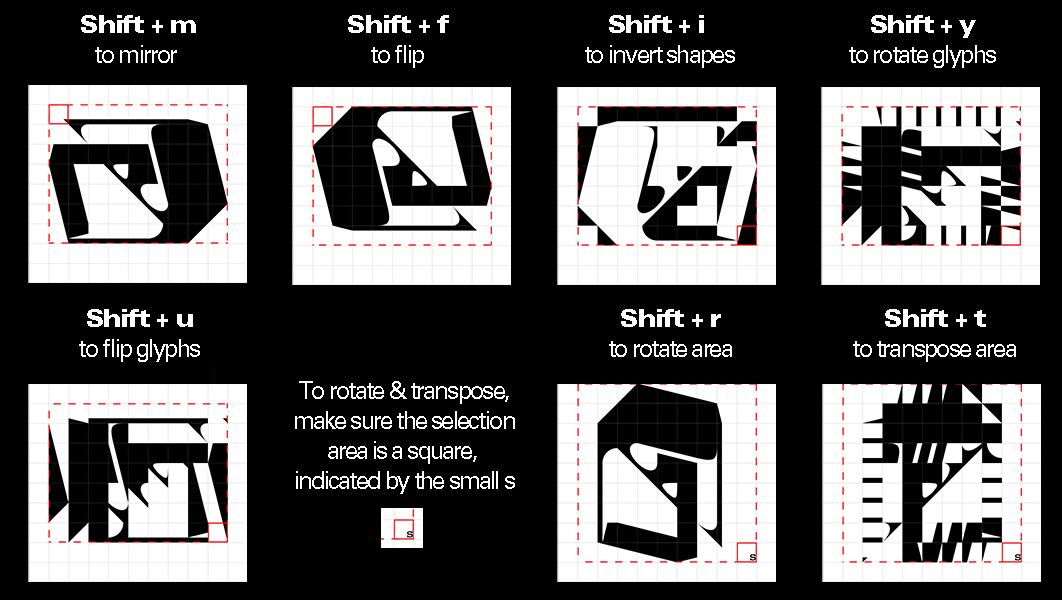
- Press
Shift + mto mirror selected area (on x-axis) - Press
Shift + fto flip selected area (on y-axis) - Press
Shift + ito invert all the glyphs in the selected area - Press
Shift + yto rotate glyphs individually in the selected area - Press
Shift + uto flip glyphs individually in the selected area
Note: the following transformations only work if your selection is a square (for example 3 x 3). You can make sure if the selection is square by the small "s" that appears inside the red cursor, or by checking the top right corner of the canvas area that says "selection x:# y:#".
- Press
Shift + rto rotate the selected area. - Press
Shift + tto transpose selected area. Transposing means that each glyph will be mirrored on a diagonal axis (axis goes from top-left to bottom-right of your selected area).
Fill & empty selected area
- Press
Shift + qto fill selected area with the selected glyph - Press
Shift + eto empty selected area
Move selected area
- Press
Shift + hto move selected area left - Press
Shift + jto move selected area down - Press
Shift + kto move selected area up - Press
Shift + lto move selected area right
Note: Moving a selected area will erase any glyph in its path on the same layer. If you want to move something on top of another area that has glyphs in it, make sure they are on different layers.
Working with layers
Layers work a bit differently in Glyph Drawing Club than on other editors. Rather than the whole canvas sharing a layer, each individual cell has its own predefined amount of layers. Each cell has 4 layers you can place a glyph on.
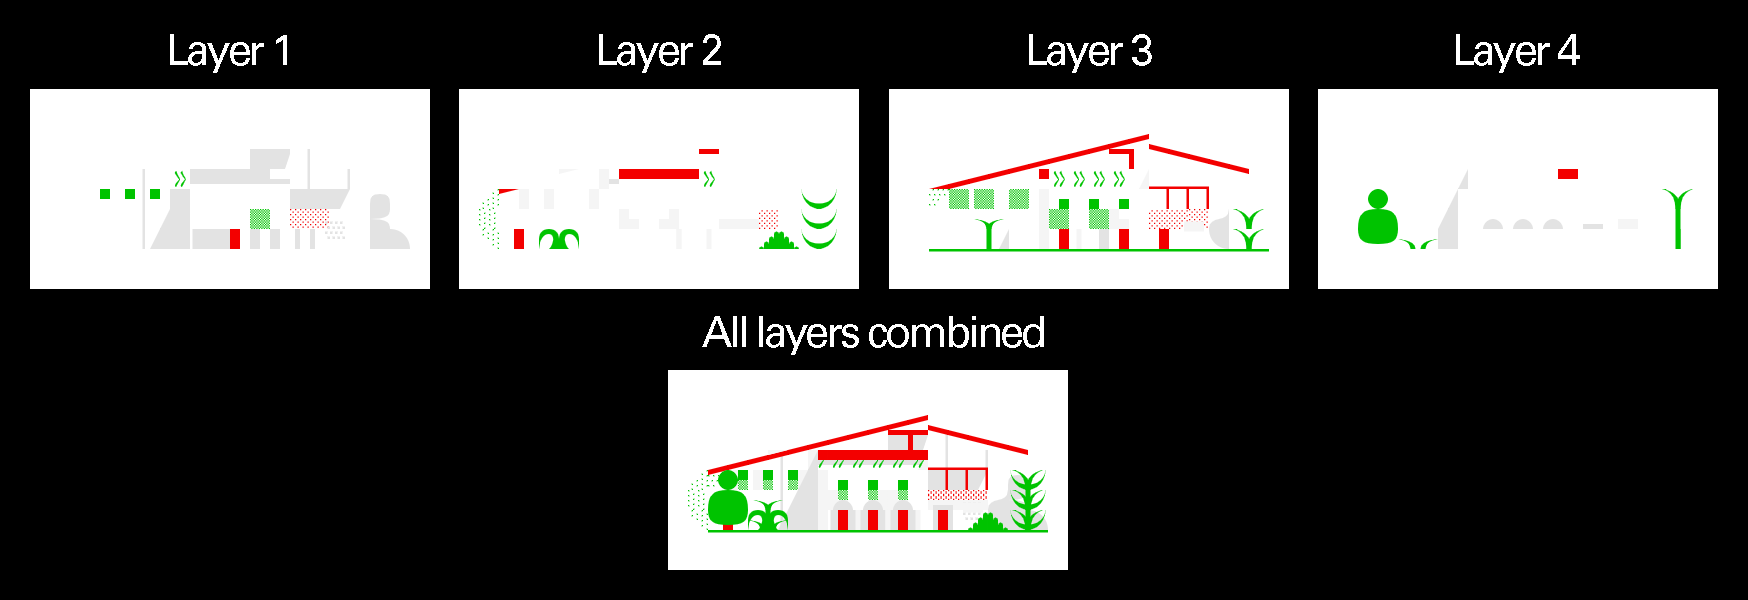
Layers come in handy in many situations. To name the most common cases:
- If you are working on a complex image you might want that extra level of detail by overlapping several glyphs on each other.
- If you can't find a suitable shape you can make a "new" shape by using layers and overlapping two or more glyphs.
- You are working with multiple colors
Note: When you move the red cursor on top of a cell, the layers tab shows you which glyph you have on which layer.
Select a layer
- Select the Draw tab
- Select the layer you want to place glyphs in by clicking on the numbered radio buttons below the "Layers" section
- You can also select layers with
,and.hotkeys.
Moving glyphs from one layer to another
- If you want to move a glyph from layer 1 to layer 2 for example, simply press the right arrow button below layer one. This makes glyphs in layer 1 and 2 swap places.
- If you want to move all glyphs in a selected area from one layer to another, make a selection and press the arrow buttons.
Hide layers
Sometimes it gets hard to see what is what on each layer, so you can press the "hide" checkbox under the corresponding layer to hide all the layers on the canvas.
Keyboard shortcuts with layers
If you want to affect all layers with a keyboard shortcut you can press ctrl + any shortcut. All of the aforementioned keyboard shortcuts work this way, including the selection area transformations. For example:
- If you want to rotate a cell that has multiple glyphs on multiple layers, you can press
ctrl + rinstead of justr.
Using glyph sets
Sometimes you want to use a limited amount of glyphs, but it gets annoying to constantly shift through pages to find and use the same glyphs again and again. For this reason you can use glyph sets to save a selection of 10 glyphs for faster use and access.
Creating and using a glyph set
- Press
mto activate glyph mapping or click the "map keys" checkbox under "Glyph sets" section in the draw tab. - Select a glyph from the "Glyph selection"
- Press any number from
1 to 10on your keyboard. This will "map" the selected glyph into that number key. - Press
magain to stop the mapping or click the "map keys" checkbox again. - Press number keys from
1 to 10that has a glyph mapped into it. This will insert the mapped glyph onto the canvas.
Note: You can create multiple glyph sets by clicking the "Add" button, select previous glyph sets by clicking the numbered buttons, or delete selected glyph set with the "Delete" button.
Paint mode
Glyph Drawing Club also includes a simple "paint mode" for drawing with the mouse. Paint mode is useful especially when sketching or if you want the red cursor to follow your mouse cursor.
- Click the Paint mode checkbox under "MODES & TOOLS" section in the draw tab.
- When paint mode is activated, the red cursor follows your mouse cursor.
- "Paint" by clicking on the canvas or holding down
Left click
Glyph offsets and scaling
Even though Glyph Drawing Club has a grid, you are not limited to the grid lines. Below the "Glyph fine tuning" section in the draw tab you can scale and move the glyphs in x and y -axis. This is especially useful if you need finely position your glyphs, scale certain glyphs to make bigger arcs for example or you are using a different font that's not designed for glyph drawing club.
- With "Glyph size modifier" you can scale a glyph by one "pixel" at a time or by doubling its size.
- With "Glyph offset X" and "Glyph offset Y" you can move or shift the glyph in x and y -axis, while still technically assigned to the cell. The amount the glyph is shifted is 1/8th of the width of the glyph.
- Press "Reset to default" to reset a glyph into its default state, removing all offsets, scaling in addition to rotation, flipping, inversion.
Note: Sometimes if you use a lot of offsets and scaling it's hard to see which cell the glyph is actually assigned to. You can alt+click on a shape to move your cursor to the cell it's placed on.
Note #2: Sometimes if you offset or scale a glyph, it appears "under" or "above" another glyph next to it, when you want it to be the other way around. This happens usually if you move a glyph down or to the right. One way to avoid this is to move the glyph to a cell below the glyphs you want to overlap and offset to the left and up instead.

Incorporating color
- Colors can be used from the Color tab or by holding down
x - Each layer can have a foreground color and each cell can have a background color
- Colors are "indexed", meaning that if you use a color, it's linked to its index in the color palette. This allows you to easily change colors and palettes and these changes will apply to any glyphs using that color index.
- You can replace color palettes with the dropdown menu. There are several predefined palettes you can choose from.
- You can create multiple palettes by clicking the "Add" button, select previous palette by clicking the numbered buttons, or delete selected palette with the "Delete" button.
Select and use foreground colors
- Select foreground color by clicking on a color in the color palette. Currently selected color is indicated by the red border around it. Glyphs that are inserted on the canvas now use that color (index) as their foreground color.
- Press
vto color glyph with the selected foreground color (Shift+vfor area selection) - Modify selected color by using the R, G, B sliders.
- Numbers on top of the colors indicate which layer in the current cell uses which color.
- If using a limited color palette you can check which colors are currently in use on the canvas by clicking the "Show only used colors" checkbox.
- You can also use a foreground coloring brush by ticking the "FG" checkbox in the coloring tab.
Select and use background colors
- Each cell can also have a background color, which is under all the other layers.
- Select background color by right clicking on a color in the color palette. Currently selected color is indicated by the blue border around it. Glyphs that are inserted on the canvas now use that color (index) as their background color.
- Press
bto color cell with the selected background color (Shift+bfor area selection). - You can also use a background coloring brush by ticking the "BG" checkbox in the coloring tab.
Create cohesive color palette
- The slider under "Create cohesive color palette" brings all the colors in your current palette and on the canvas slightly "closer" to the color shown next to the slider, on a range from 0% to 100%.
- You can change the cohesion color by clicking on the colored box, and using the R, G, B sliders.
- Less saturated fore- and background colors work best with a saturated cohesion color.
Working with other fonts
With Glyph Drawing Club you can actually use any font you like!
Select one of the default fonts
- The default font for Glyph Drawing Club is Tesserae 4x4, but you can also select from a selection of preset default fonts under the "Glyph selection" section in the Draw tab and selecting a font with the "Select a preset font" dropdown menu.
Use any font
- You can also use any other .ttf or .otf font. You can load custom fonts by drag & dropping them from a folder in your computer straight into anywhere on the glyphdrawing.club site.
- If you use a custom font, you might want to adjust grid size from "Cell size" section in the "Settings" tab to better work with your font.
- If you use a font with an alphabet, you can write on the canvas by activating "Typing mode" in the "Draw tab" under "Modes and tools". This allows you to write with the keyboard normally (note that keyboard shortcuts don't work while typing mode is on).
Troubleshooting
-
You can't insert anything on the page or you are inserting black squares
- Check that you don't have Typing mode on in the "Draw tab" under "Modes and tools"
- Check that you don't have glyph set mapping on in the "Draw tab" under "Glyph Sets"
- Check that your foreground is not the same as your background color in the "Colors" tab
-
Nothing appears on the page when opening glyphdrawing.club
- Your browser might be outdated. Update your operating system and download the newest version of Chrome or Firefox (or your preferred modern browser)
-
Glyphdrawing.club keeps crashing
- Check if your file is 5Mb in size. 5Mb is the current limit for the files, and bigger ones will crash Glyph Drawing Club.
- If it's something else, it's probably another bug. Please send me an email at hlotvonen@gmail.com describing your problem and check your console if there are any errors (Ctrl+Shift+J on Windows or Ctrl+Option+J on Mac).
If you have any questions, best place to ask is Glyph Drawing Club discord: https://discord.gg/gJNDZ2M but you can also send me a message on instagram or email (links in the sidebar). Happy drawing!